Today's tutorial is on Freezer Paper Stenciling. I's seen it done on some adorable blogs as of late (Especially this one and this one), but had never attempted it before, and I was super surprised at how easy it was to do. I was mostly surprised that I actually LOVED doing it. I decided on a whim the night before Shambray's baby shower that I was going to make her some onesies and this is the result.

Adorable? Naturally. You wanna learn how to do it? Do ya? Huh?
Ok, you talked me into it.
Freezer Paper Stencils.
You will need the following:

-Fabric paint (I got this multi-pack of puff paint at Walmart for $10)
-Clothing item of your choice (I'm going to do some of my shirts next)
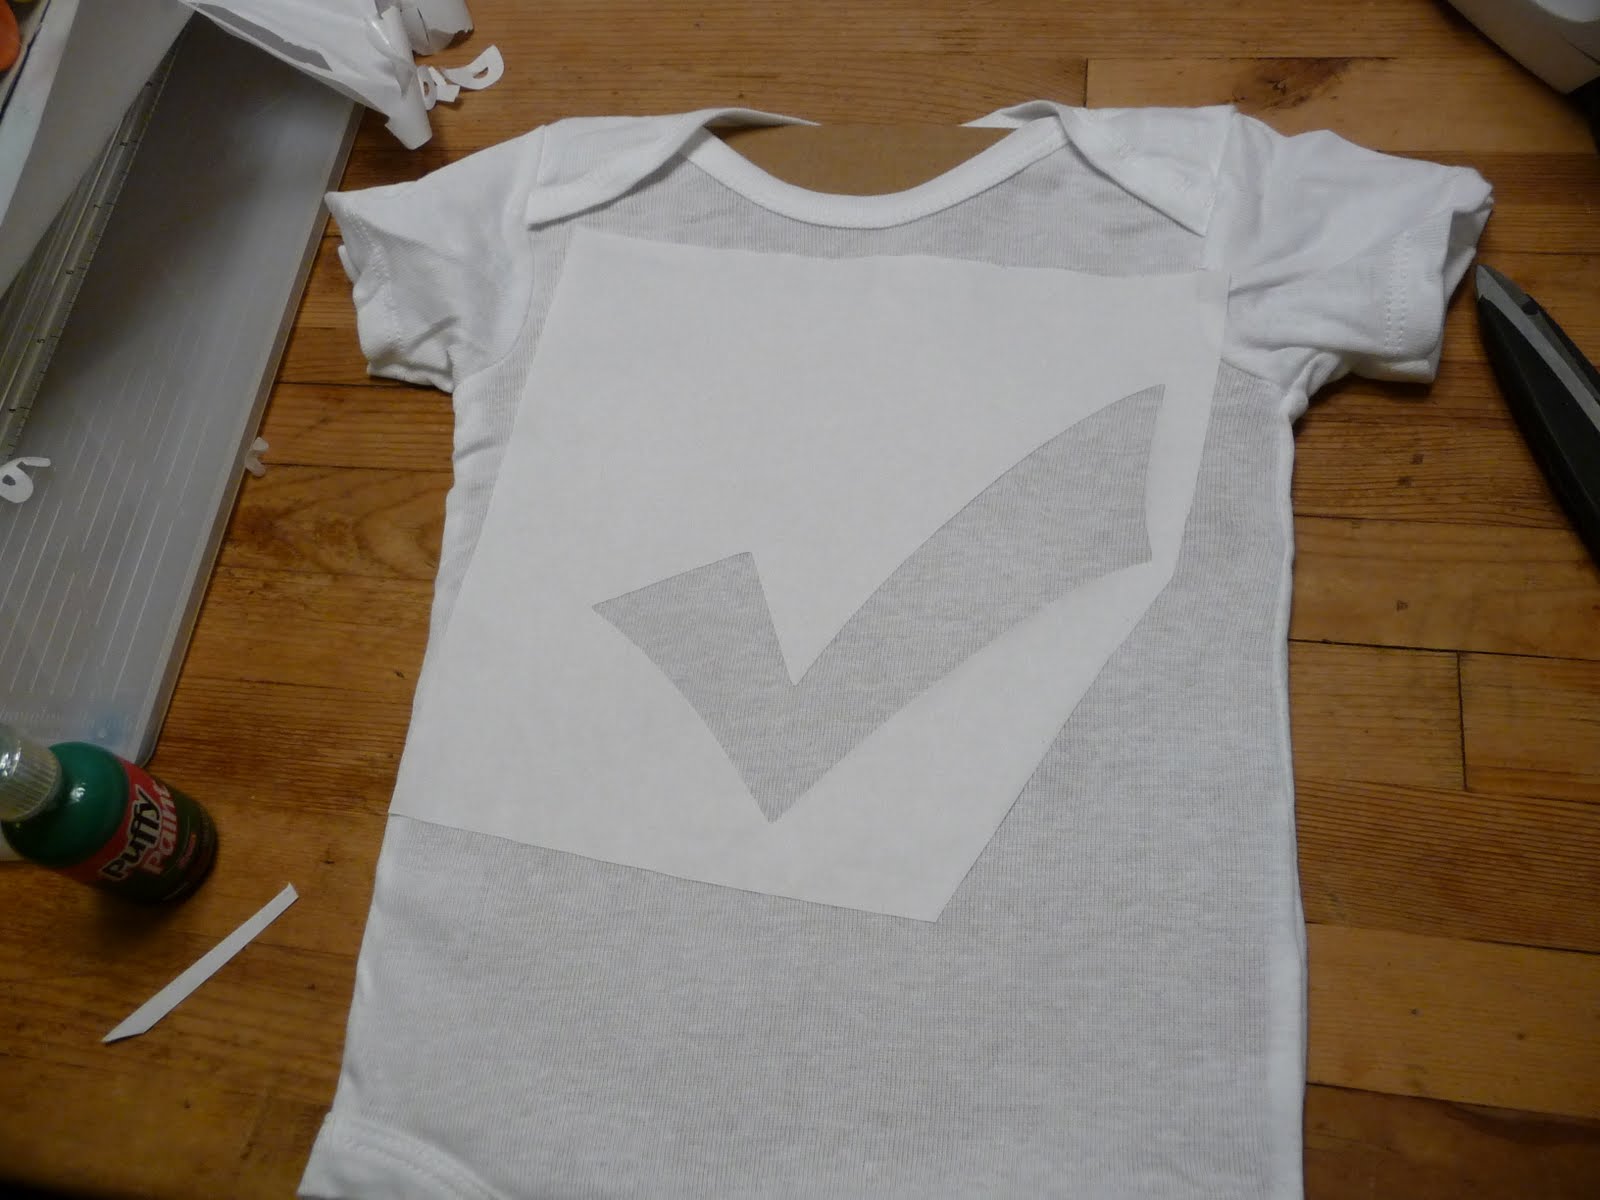
-Freezer Paper (NOT WAX PAPER or you will never get the stencil off your clothes. Freezer paper is dull on one side and kind of shiny on the other side, and it is the same type of paper your butcher wraps cuts of meat in.
-Iron
-Your design
-Cardboard cut to fit inside the clothing you are stenciling to prevent the paint from bleeding onto the other side.
-1in foam brush (these are about 60 cents at Walmart)
-small dish for your paint
-Something to cut it out with. I used my Cricut Machine with the program Sure Cuts a Lot. You can read my opinions/reviews on such here.
1. Iron your clothing item
2. Lay your Freezer Paper shiny side down and cut out your design. Remember to save any inside pieces as you will use them. As a side note my settings for cutting freezer paper on the Cricut were Blade 2, Speed 1, and Pressure 3.

3. Lay your design shiny side down on your clothing item and iron in place. Make sure that all of the edges are ironed down tight. Do not use steam.
4. Squirt out your paint and dip your foam brush in it. Less is more and you can always pour out more paint later.

5. Paint on your color making sure your paint does not go over the sides you don't want to paint. Apply as many coats as needed for nice, even coverage. Allow paint to dry (at least 20 minutes)

Another nice thing to note, this stuff is a lifesaver when it comes to cleaning your brushes, or cleaning it off the carpet if you happen to knock the brush off the table. I'm speaking from personal experience here.

6. Once the paint is dry, remove the freezer paper, making sure to get all of your little inside pieces out. I find tweezers and a needle are the best tools for the tiny ones.

7. If you are doing an image with multiple layers, paint the first layer then wait for it to dry and remove the freezer paper, then iron on your second layer. Make sure to iron on all of your little details.

8. Paint on your second layer, allow to dry, then remove the freezer paper.


These were so popular that I got a request for another one. It's one of my favorites.

If you think of any other cute sayings you'd like to see please comment below. These designs are for sale at my Etsy Store, though if you live in Utah feel free to email me your request and I'll waive the shipping.
2 comments:
My best friend keeps nagging at me to create an Etsy store but I don't think I'd end up making any money. How successful have you been with your store? Or did you just open it?
These onesies are a great idea and such an easy and awesome gift.
I've had it for a while but this is the first time I've actually posted anything on it. It costs $0.20 to list an item, so I just listed one shirt of each type so I don't pay much if they don't sell. I need to post better pictures of them if I want them to sell though.
Post a Comment